

How To Build A Keyhole Raised Garden
I love having a garden bed and love sharing advice with others on how to build one.
After procrastinating for years about planting a garden, I finally relented and decided to forge ahead with not just any garden, but a raised garden at that. In the process, I realized that my yearly excuses for not planting a vegetable garden were pretty lame and I should have done this years ago. My father was an avid gardener and for as long as I can remember he had a wonderful garden that we all reaped the benefits from.
And so as with most of my projects, once I got started, which always seems to be the toughest part, I plunged in headfirst and we quickly decided on the perfect location that gets plenty of sunshine.
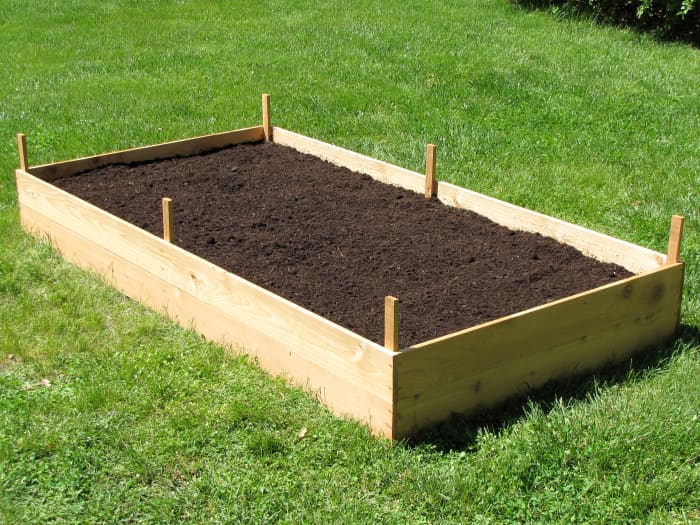
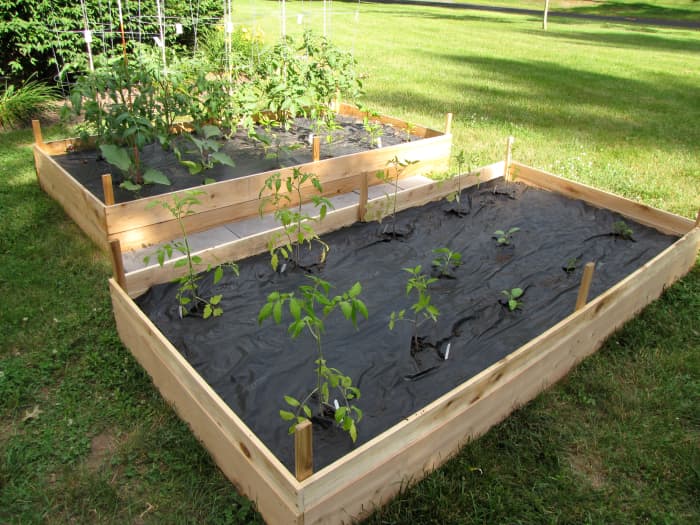
Raised Garden Bed 4' X 8'
Bill DeGiulio
I decided that I would start off with a modest four-foot by eight-foot raised bed and if everything went well I would expand with another raised bed next year. While you can build a raised bed with virtually any type of wood, I opted for a cedar box that would withstand the elements for years to come. Keep in mind that you can use pretty much any type of wood for this. Cedar, juniper or redwood are the preferred types of wood for raised boxes due to their resistance to the elements and long life-span, but you can certainly use any reclaimed or recycled wood. The one type of wood I would stay away from is pressure treated lumber as the chemicals used to treat the wood can leech into the soil.
- The first step in this process is to select the area of your yard to place your raised garden. You preferably want a level area that gets plenty of sunshine.
- Decide on the size of your bed, which can be any size from a simple two-by-two-foot box for spice plants or flowers to as large as you want. I selected a four-by-eight box, which I felt was large enough to fit a variety of plants but not too big to be unmanageable.
- Once you have decided on the dimensions of your raised bed you must decide on the height of the box. This can range from just six inches to as high as two or three feet. Just remember that the higher your bed the more soil it will take to fill it.
I decided on a 12-inch height for no other reason than this seemed reasonable. This would allow plenty of room for the roots to grow but it wouldn't be too high that I would need a dump truck to fill it. I now set out to find some 1 x 6 x 96-inch cedar boards. You can just use 12-inch wide boards but I found it cheaper to use two of the 6-inch boards stacked one on top of the other to achieve my desired 12-inch height.
For this size box, you will need six cedar boards measuring 1 inch by 6 inches by 8 feet. This is a common size board and you should be able to find it in any lumberyard. You will also need two 1 x 2 x 96-inch pieces of cedar that will be used as corner pieces.
- Hand Saw/Circular Saw
- Screw Gun/Screwdriver
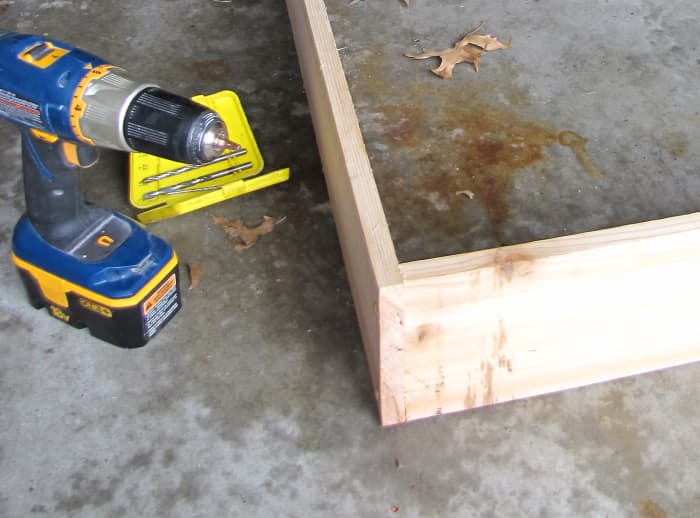
- Cordless Drill
- Drill Bits
- Tape Measure
- Rubber Mallet
- Deck Screws
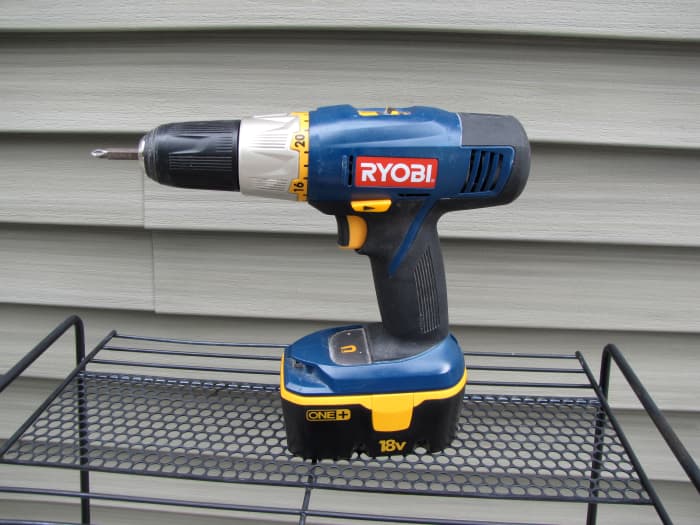
Cordless Drill
Bill DeGiulio
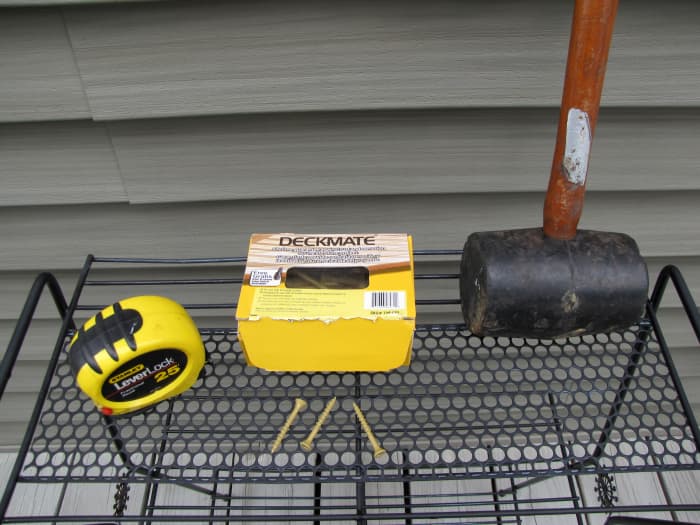
Tools Required: Tape measure, deck screws, rubber mallet.
Bill DeGiulio
Time to Build
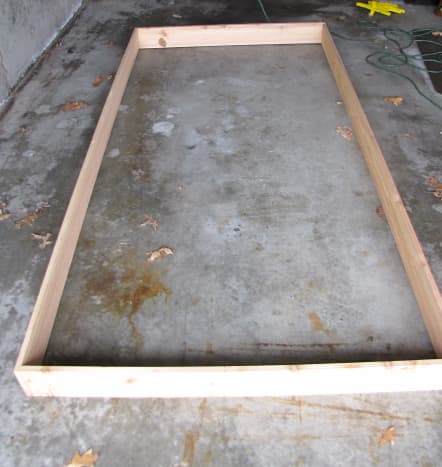
To make our raised garden box 12-inches high we are going to build two boxes and place one on top of the other. If you opt for 12-inch boards you will need just one box. Start by taking one of the eight-foot boards and cut it in half. These four-foot pieces will form the ends of your box. Now simply attach the two eight-foot pieces to the four-foot pieces to build a rectangular box using galvanized or polymer-coated deck screws. I used three screws at each corner and quickly had a nice four by eight cedar box. I pre-drilled the holes to prevent the wood from splitting.
Bill DeGiulio
Simply repeat the process if you are building two boxes and take them out to where you plan to plant your garden. Place your first cedar box where you want it. I used a 1-inch by 2-inch piece of cedar cut to a 24-inch length as a corner piece. Using a rubber mallet I inserted the corner piece about six inches into the ground and repeated the process at each corner. I then attached my box to the corner pieces to secure it in place. Now place your second box on top of the first and secure it to the corner pieces. You can place additional 1 x 2's at the midpoints of the sides to provide additional strength. When completed it should look something like this.
When cutting your 1" x 2" anchor pieces, cut them at an angle to make it easier to hammer them into the ground.
Bill DeGiulio
Once your raised garden box is in place it's time to turn over the grass/soil inside the box. I did this by hand but you can certainly use a rotor-tiller if this makes it easier for you. If you do use a tiller be sure to turn over the soil before building your box so you don't have to lift the equipment up and into the box.
To fill the box with soil you have a few options available to you. You can buy garden soil at your local garden center or you can fill it yourself if you have good soil available. Don't be afraid to use your raised garden box as a composting box during the off-season to help enrich the soil. You are now ready to plant and reap the rewards of your work with whatever garden vegetables you decide to plant.
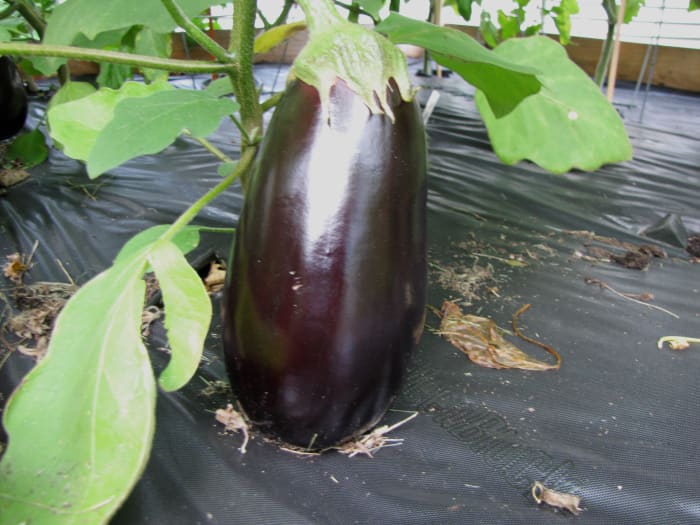
Eggplant
Bill DeGiulio
Bill DeGiulio
Read More From Dengarden
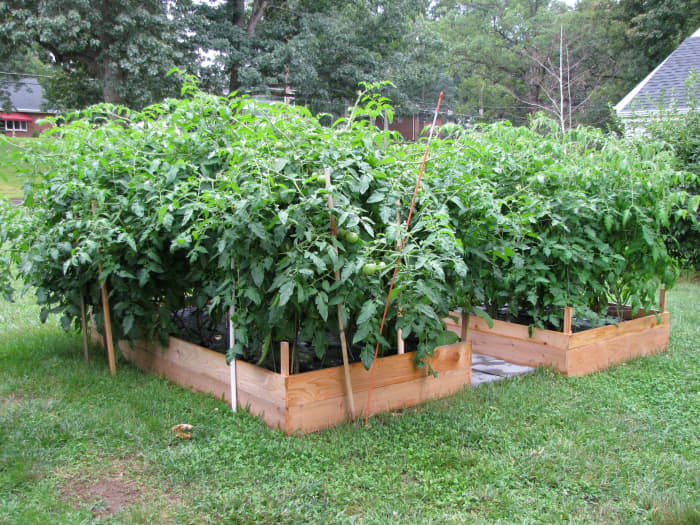
You will notice from the pictures that I have two raised beds side by side. I was so inspired after building the first one that I went ahead and constructed a second garden box. You can see that the plants in the second box are a few weeks behind the first box and this will ensure that we have a longer harvest period come late summer.
It took about two hours to construct and assemble the boxes. If you are using only one box as opposed to stacking two you should be able to complete this even quicker. The time spent constructing your raised garden boxes will allow you to reap the benefits of growing your own vegetables for years to come.
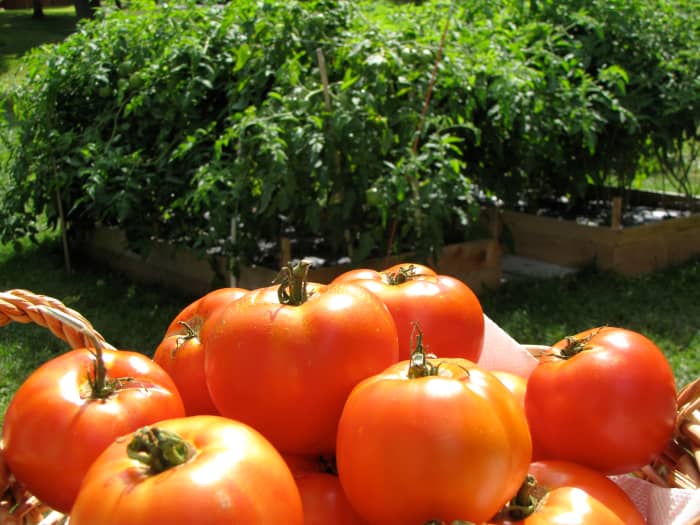
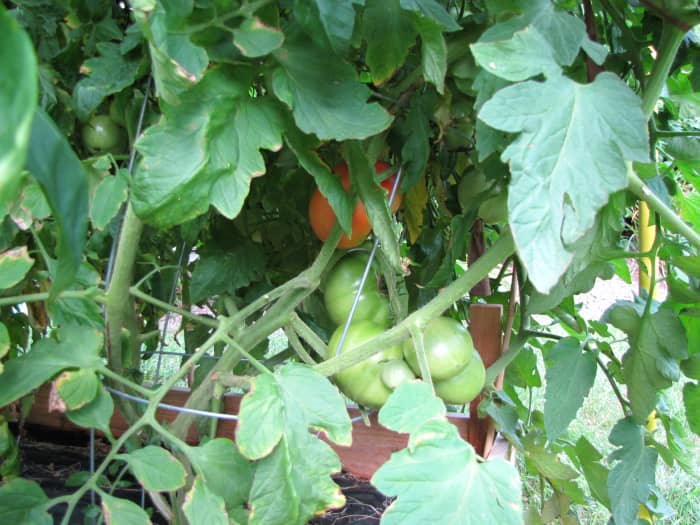
There's nothing quite like garden fresh tomatoes!
Bill DeGiulio
Bill DeGiulio
This content is accurate and true to the best of the author's knowledge and is not meant to substitute for formal and individualized advice from a qualified professional.
Questions & Answers
Question: How many cubic feet of top/garden soil did you use to fill the bed?
Answer: It will depend on how deep you made the bed. For a 4' by 8' by 12" high bed figure about 1.25 cubic yards. If the bed is deeper maybe 1.5 cubic yards.
© 2014 Bill De Giulio
Bill De Giulio (author) from Massachusetts on May 21, 2020:
Good luck.
Eric on May 21, 2020:
Building two garden boxes tomorrow based off of your plans. i'll let you know how it goes.
Bill De Giulio (author) from Massachusetts on February 16, 2016:
Thanks Shyron. We've had a couple of pretty good years here with the garden but there are never any guarantees. It won't be long now before we're back at it. Thanks for stopping by, have a great week.
Shyron E Shenko from Texas on February 16, 2016:
Hi Bill, I love your raised garden it is beautiful. Hubby and I had a raised garden for the first ten years we were here in Texas, but the last few years have been to hot and the crops don't do well.
Wishing you good harvest.
Bill De Giulio (author) from Massachusetts on May 17, 2015:
Hi Linda. Thank you. Have a great day.
Bill De Giulio (author) from Massachusetts on May 17, 2015:
Thanks Flourish. I know, very surprising. Enjoy the rest of the weekend.
Bill De Giulio (author) from Massachusetts on May 17, 2015:
Thank you TorriLynn. Glad you found this hub informative. Give it a try sometime. Thanks for stopping by. Have a great day.
Linda Crampton from British Columbia, Canada on May 16, 2015:
I'm back to say congratulations on the HOTD, too. You certainly deserve the award!
FlourishAnyway from USA on May 16, 2015:
I'm back to say congratulations on HOTD. Wow, two within such a short time frame! You're on a fabulous roll here, Bill. Great job!
torrilynn on May 16, 2015:
I never knew there were different types of garden bed. thanks for this informative and interesting hub that helps people to build cedar raised garden beds. Best of wishes.
Bill De Giulio (author) from Massachusetts on May 16, 2015:
Thank you Cynthia. Glad you enjoyed the hub. Garden season is here :). Thanks so much for the visit, share, etc.. Have a great day.
Cynthia Zirkwitz from Vancouver Island, Canada on May 16, 2015:
Congrats on HOTD-- this is a wonderfully clear description of how to build a cedar planter and get started in producing your own delicious food! Thank you! Sharing!
Bill De Giulio (author) from Massachusetts on May 16, 2015:
Thank you Mary.
Bill De Giulio (author) from Massachusetts on May 16, 2015:
Thank you Akriti.
Mary Craig from New York on May 16, 2015:
I had to come back and say congrats on your HOTD....job well done, and hub well done!
Akriti Mattu from Shimla, India on May 16, 2015:
Congratulations :)
Kristen Howe from Northeast Ohio on May 16, 2015:
Thanks Bil. If you have any tips for me, let me know. You're welcome.
Bill De Giulio (author) from Massachusetts on May 16, 2015:
Hi Kristen. Any garden is a good garden, no matter where you plant it. Good luck with your indoor garden this year. Thanks for the vote. Have a great day.
Thank you Hiedi. It is somewhat ironic. I have over 100 travel hubs and 1 gardening hub and this one gets picked. I'm not complaining, just find it interesting. Thank you for stopping by, have a great weekend.
Hi there Dr Bill. So glad you enjoyed the hub and found it useful. Now we just need some of that Florida weather up here. Thanks, and have a nice weekend.
Thank you pawpawwrites. If I can do it anyone can. Give it a shot, it's really pretty easy to put together. Thanks for stopping by, have a great day.
Hi Susan. I looked at the kits and thought to myself, I can make this on my own. Either way it's all good. I just hope the crop this year is as good as last year. We had so many tomatoes we had to freeze many of them. We still have some in the freezer from last summer. Thanks for stopping by to comment, have a great weekend.
Bill De Giulio (author) from Massachusetts on May 16, 2015:
Thank you Linda. They're so easy to make and you can place them almost anywhere. It's always exciting to plant the garden every year and see it come to life. We are just about there here in New England. Have a great weekend down there in the sunshine state:)
Bill De Giulio (author) from Massachusetts on May 16, 2015:
Hi RTalloni. I researched the best wood to use and decided on cedar. It holds up to the elements very well. The beauty of making these is you can make it whatever size you choose. Good luck, thanks for stopping by, and have a nice weekend.
Bill De Giulio (author) from Massachusetts on May 16, 2015:
Thank you Peggy. We started building the raised beds last year and will try to add a few more this year. The more raised beds I have the less grass there is to mow, which is a good thing. Thanks for the share, pin, etc., have a great weekend.
Susan Deppner from Arkansas USA on May 16, 2015:
We have a 4x4 raised garden bed that we constructed from a kit. My husband is retiring and could use a project for the winter, so I'm thinking this would be a good one since I definitely want to expand the garden area next year. Lots of good eatin' in those gorgeous garden boxes. Thanks for the inspiration and congratulations on HOTD honors today!
Bill De Giulio (author) from Massachusetts on May 16, 2015:
Hi Mary. If I could do it then then so can you. Give it a try. We are just about getting to the planting time of year up here in New England. Last year was a great crop. We'll see what this year has in store. Good luck and thanks so much for the vote, share, pin, etc.
Jim from Kansas on May 16, 2015:
Thanks for the how to. This is on my list of things to do.
Bill Tollefson from Southwest Florida on May 16, 2015:
Thanks from one Bill to another Bill. What a useful and detailed HUB on making a raised garden and what you need and how to get it done.
Heidi Thorne from Chicago Area on May 16, 2015:
Funny that with all your outstanding travel photo hubs, the one that gets Hub of the Day is one on gardening. :) But this one is very useful and, of course, the photos are first rate. Congrats on Hub of the Day! Well deserved!
Kristen Howe from Northeast Ohio on May 16, 2015:
Congrats on HOTD, Bill. This was a well-detailed and structured hub on how to build a cedar garden bed. Great advice. My garden will be indoors and contained, since I live in an apartment. Voted up for useful!
Linda Bilyeu from Orlando, FL on May 16, 2015:
Awesome idea! My stepdaughter started a pallet garden this year and it is beginning to flourish...very exciting to see the new life. Congrats on your HOTD! :)
RTalloni on May 16, 2015:
Congratulations on this Hub of the Day award for your DIY on building raised garden beds. We've been looking at designs but haven't gotten as far as looking at the best wood to use. Cedar, of course!
Peggy Woods from Houston, Texas on May 16, 2015:
What wonderful looking garden beds you have there Bill! My gardening has all been without the benefit of such raised beds but my hubby and I built one for my mother after my dad died. We made it about the same dimensions but higher so that she did not have to do much bending. She loved it and grew an amazing amount of produce from it. A well deserved HOTD! Sharing and pinning to my gardening board.
Mary Hyatt from Florida on May 16, 2015:
I think I could do this!! I have the drill and am pretty good at woodworking. I'm just thinking about the expense of purchasing the soil; my soil here in S. Fl. is just sand! I like your idea of using the box in off season for making compost!
I have three tomato plants that are growing like crazy in containers. I would be so thrilled to get a harvest of them.
Contrats on HOTD, voted UP, and shared here and Pinned to my gardening board.
Bill De Giulio (author) from Massachusetts on May 16, 2015:
Thank you Sally. You can do this:). It's really not that difficult. We are getting ready to plant this years garden, can't wait. Thanks for stopping by. Have a nice weekend.
Sally Gulbrandsen from Norfolk on May 16, 2015:
bdegiulio
Well done on your HOTD, excellent job. That is my kind of gardening, now I just have to find someone to build me one!
Bill De Giulio (author) from Massachusetts on March 11, 2015:
Hi Marlene. The landscape fabric works great for keeping the weeds out. I don't think I pulled one weed last year. Good luck with your garden this year, we are still many weeks away up here. Thanks for stopping by.
Marlene Bertrand from USA on March 10, 2015:
I am a big fan of the raised garden. Your veggies look awesome. I see that you use black plastic in your garden. I just planted my garden today. I totally wish I had read your hub a few hours ago. I would have placed the black plastic down before putting the seeds in the ground. Fortunately, there's next year!
Bill De Giulio (author) from Massachusetts on October 05, 2014:
Hi twodogs. That's exactly what I do. I turn on the hose and just let it run in the raised bed. Very simple. The water will soak through the weed block as well as soaking in the holes that I cut around the plants.
I can't wait till next spring. I plan on adding another raised bed or two. Thanks for stopping by. Have a great day.
twodawgs on October 05, 2014:
Hi Bill - nice work on the raised garden - your tomatoes look fantastic! I just took the plunge with a single "square-foot" raised garden bed this fall after failing miserably this summer with ground-level row gardening in a small patch in my back yard. This works much better so far! In one little 4'x4' bed, I've got green beans, cabbage, carrots, spinach, onions, and lettuce. I'll be adding more for next spring, for sure!
Question: for watering, do you just flood the weed stop and let it go down the holes where the plants are coming through?
Bill De Giulio (author) from Massachusetts on August 26, 2014:
Hi Mary. Our soil is sandy also so that's why we decide to go with the raised beds. It has worked out great so far. Thanks so much and welcome back.
Mary Craig from New York on August 26, 2014:
Beautifully done Bill. Now my husband has two choices from both Bills. Our soil is so sandy it's a battle to grow a vegetable garden. Raised beds are the only way to go!
Voted up, useful, interesting, and pinned.
Bill De Giulio (author) from Massachusetts on August 16, 2014:
Hi Rebekah. Thank you. The garden has certainly flourished this year. There really is nothing better than tomatoes right from the garden. The raised beds have worked out great and we plan on adding more next year. Thanks so much for stopping by, hope your having a great weekend.
rebekahELLE from Tampa Bay on August 16, 2014:
WOW! Mr. Green Thumb, your garden looks amazing! I love the look of raised gardens, plus there is an advantage if there are super heavy rains that drown the yard, which can happen where I live. Not only is this a wonderful tutorial hub, your end product flourished!! Enjoy the fruit of your labor.
Bill De Giulio (author) from Massachusetts on August 10, 2014:
Hi Dianna. There are plenty of tomatoes this year so help yourself :). It's really been a lot of fun in addition to the obvious benefit of having a source of veggies. Give it a try, you don't need a lot of space. Thanks for stopping by, have a great day.
Dianna Mendez on August 09, 2014:
I only wish I were your neighbor so I could have some of your wonderful veggies. One day I hope to have space to have a garden such as yours. I will certainly try the raised garden bed idea you present here.
Bill De Giulio (author) from Massachusetts on August 07, 2014:
Hi Donna. I would not use plastic mulch in my garden either. I used organic garden soil to fill the beds and I rolled the weed block over the top to help keep out the weeds. Seems to be working well so far.
Bill De Giulio (author) from Massachusetts on August 07, 2014:
Hi Shelley. Thanks for the visit. Give it a try. Took me years to finally do this and we are already starting to reap the benefits.
Bill De Giulio (author) from Massachusetts on August 07, 2014:
Hi Linda. It is looking like a good season so far, at least for the tomatoes and eggplant. It's been a lot of fun. I hope to expand it next year. Have a great weekend.
Cygnet Brown from Springfield, Missouri on August 07, 2014:
You were smart starting with the smaller 4x8 foot beds rather than getting overly ambitious and building larger beds. I know I would not have gone with the plastic mulch, however. I much prefer an organic mulch such as aged sawdust or leaves.
Shelley Watson on August 07, 2014:
Looking forward to trying the raised bed - thanks for peaking my interest again!
Linda Crampton from British Columbia, Canada on August 06, 2014:
This is a useful hub, Bill. I'm sure a lot of gardeners will appreciate it! The plants look like they're doing well. I hope you have a good harvest.
Bill De Giulio (author) from Massachusetts on August 06, 2014:
Hi Dr Bill. Oh no, the dreaded black thumb :). So sorry to hear. It really has been fun. Thanks for stopping by, have a great week.
William Leverne Smith from Hollister, MO on August 06, 2014:
I would love to have one of these! But, no space, and I have, as my wife so aptly says... a black thumb... when it comes to gardening. Whatever I plant either dies or creates a new variety of dwarfdom... a story for another day.
Thanks for sharing. Looks like so much fun!! ;-)
Bill De Giulio (author) from Massachusetts on August 05, 2014:
Hi Flourish. If I can do this anyone can do it. Just get your husband started and he'll become addicted. There certainly is something very soothing and calming about having a garden. Thanks so much for the pin, have a great week.
Bill De Giulio (author) from Massachusetts on August 05, 2014:
Thanks Bill. You certainly did inspire this. Next year will be bigger and better. It's looking like a great crop this year and I can't wait to get home everyday to check on the garden. You are making a difference Bill, one person at a time.
FlourishAnyway from USA on August 05, 2014:
Wonderful job. I would love to have a couple of these in my back yard. Iam going to show this to my husband to get him inspired. Pinning to my Garden and Outdoors board and voting up and more.
Bill Holland from Olympia, WA on August 05, 2014:
Look at you Mr. Greenthumb! and we use the same drill. :) I love it, Bill. Not only did we finally get you gardening, but now you're writing about it, and look at that crop! I think you have a future in this.
Thanks so much for sharing my links. You're a good guy!
How To Build A Keyhole Raised Garden
Source: https://dengarden.com/gardening/How-to-Build-a-Cedar-Raised-Garden-Bed
Posted by: oharafeelitere.blogspot.com
0 Response to "How To Build A Keyhole Raised Garden"
Post a Comment